 Save to Pinterest
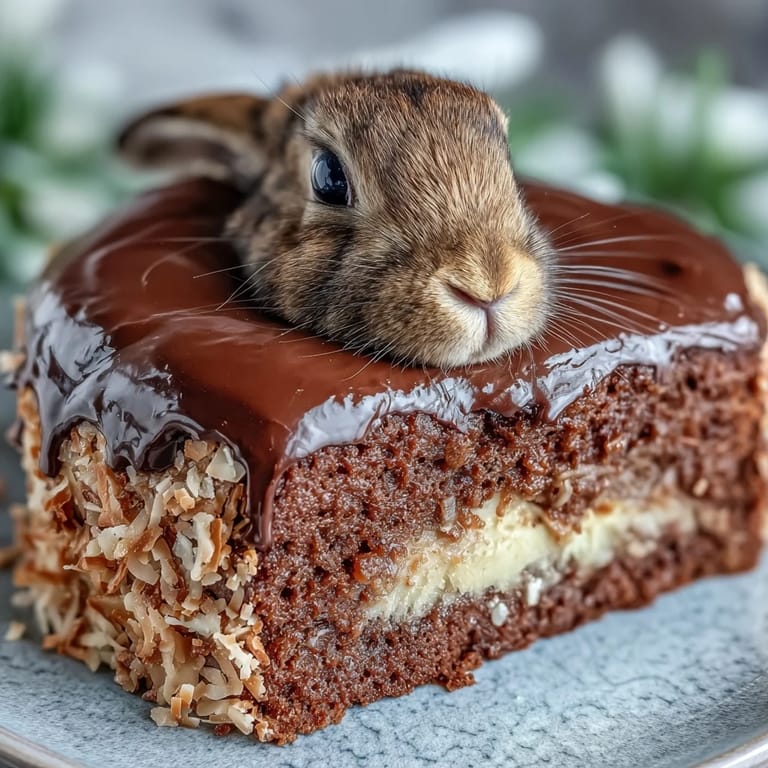
 The first time I assembled an Easter Bunny Cake, my daughter was four and had just discovered that surprises hidden inside desserts were basically the best invention ever. I'd seen this whimsical bunny shape in a magazine and thought, why not attempt something that feels like pure magic? Watching her face light up when we sliced into it and rainbow sprinkles tumbled out made every slightly lopsided ear and frosting mishap completely worth it. Now it's become our Easter tradition, and honestly, I've learned to embrace the imperfect charm of a homemade bunny that looks like it has personality.
I'll never forget the year my neighbor brought her whole family over for brunch and I unveiled this cake as dessert. Their teenage son, who'd been skeptical about "Easter activities," actually asked for a second slice and wanted to know how I made it. That's when I realized this cake isn't really about being perfect—it's about creating a moment where everyone at the table feels a little bit younger and more delighted than they did five minutes before.
Ingredients
- All-purpose flour (3 cups): Use a good quality brand if you can—it makes the cake tender and fine-crumbed, which matters when you're trying to cut that hole for the sprinkles without the whole thing crumbling.
- Baking powder (2 ½ tsp): Don't skip checking the expiration date; stale baking powder won't give you that light, fluffy rise that makes this cake feel special.
- Unsalted butter (1 cup for cake, 1 cup for frosting): Softened butter incorporates air better—set it on the counter about an hour before baking, not in the microwave.
- Granulated sugar (2 cups): This is where sweetness lives, but resist the urge to add more; the buttercream frosting brings plenty of additional sugar.
- Large eggs (4): Room temperature eggs mix more smoothly into the batter, creating a more uniform crumb structure.
- Vanilla extract (1 tbsp for cake, 1 ½ tsp for frosting): Pure vanilla tastes noticeably better than imitation, especially in something this simple and cake-forward.
- Whole milk (1 cup): The gentle acidity helps activate the baking powder and keeps the crumb moist.
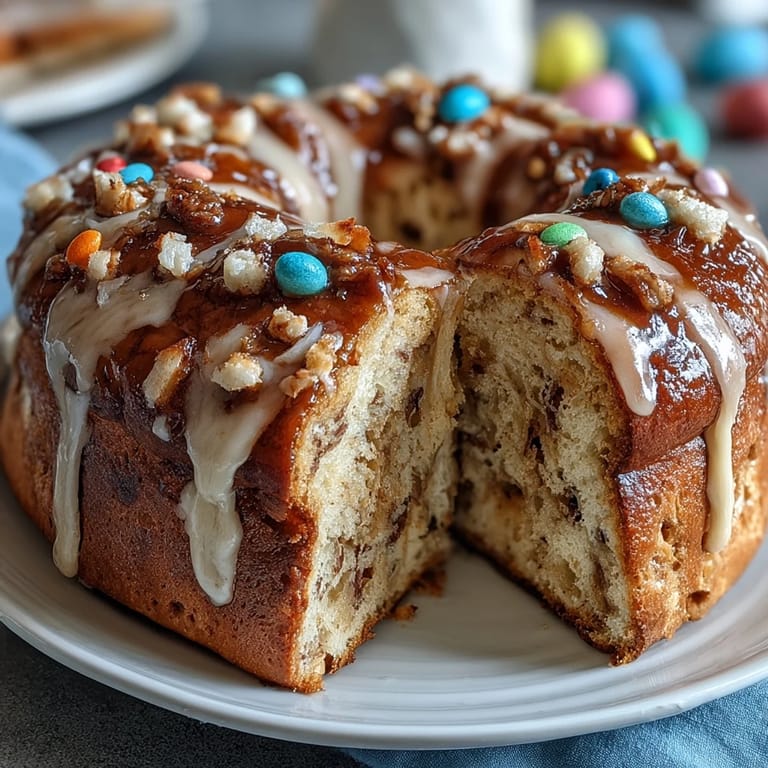
- Assorted sprinkles (1 cup for center): The star of the surprise—use a mix of rainbow and pearl sprinkles for visual drama when the cake is sliced.
- Powdered sugar (4 cups): Sifted powdered sugar frosting is smoother and less grainy than unsifted, so take the extra minute.
- Milk for frosting (2–3 tbsp): Start with less and add gradually until you reach spreadable consistency; you can always add more, but you can't take it out.
- Pink food coloring (optional): Gel coloring gives you vibrant pink ears and nose without watering down the frosting like liquid coloring does.
- Shredded coconut, candy eyes, jelly beans, marshmallows: These are your decorative toolkit—pick items that feel festive to you, whether that's store-bought or handpicked from specialty shops.
Tired of Takeout? 🥡
Get 10 meals you can make faster than delivery arrives. Seriously.
One email. No spam. Unsubscribe anytime.
Instructions
- Prepare your workspace and preheat:
- Turn your oven to 350°F and grease those cake pans generously—I use a combination of softened butter and flour because it prevents sticking better than cooking spray alone. While the oven comes to temperature, take your butter and eggs out so they can reach room temperature; this matters more than you'd think.
- Mix your dry ingredients:
- Whisk flour, baking powder, and salt in a bowl and set aside—this distributes the leavening agent evenly so you don't end up with dense pockets. The whisking also aerates the flour slightly, which contributes to a lighter texture.
- Cream butter and sugar together:
- Beat softened butter with sugar until it looks pale, fluffy, and almost mousse-like; this usually takes 3–5 minutes with an electric mixer. This is where you're incorporating air into the batter, which translates to a tender crumb in the finished cake.
- Incorporate eggs one at a time:
- Add each egg individually and beat well before adding the next one—rushing this step means you'll have an emulsion that doesn't hold together as smoothly. Once all eggs are in, add vanilla and mix until combined.
- Alternate flour and milk in thirds:
- Add one-third of the flour mixture, then half the milk, then another third of flour, then the remaining milk, then the final flour portion. Mixing only until combined prevents overworking the batter, which would make the cake tough and dense.
- Divide batter and bake:
- Pour the batter evenly between your prepared pans and smooth the tops with an offset spatula. Bake for 35–40 minutes until a toothpick inserted in the center comes out clean—my oven runs a bit hot so I check at 35 minutes, but yours might need the full 40.
- Cool properly before decorating:
- Let cakes rest in their pans for 10 minutes—this prevents them from cracking—then turn them out onto wire racks to cool completely. Trying to cut or assemble a warm cake is a recipe for a crumbly disaster.
- Level and cut the center hole:
- Once completely cool, use a serrated bread knife or cake leveler to make sure your cake layers are even on top. Using a 3-inch round cutter, carefully punch out a hole from the center of one cake layer; save that cake round, as it becomes your seal.
- Assemble the layered surprise:
- Place the intact cake layer on your serving plate, spread a thin layer of buttercream, then top it with the layer that has the hole. Fill that hole generously with sprinkles—this is the moment the whole cake gets its personality—then place the reserved cake round on top like a lid to seal the surprise inside.
- Make your buttercream frosting:
- Beat softened butter until creamy, then gradually add powdered sugar a little at a time to avoid a powdered sugar dust cloud. Once smooth, add vanilla and milk until the frosting reaches a consistency that's spreadable but still holds its shape—it should look like fluffy clouds.
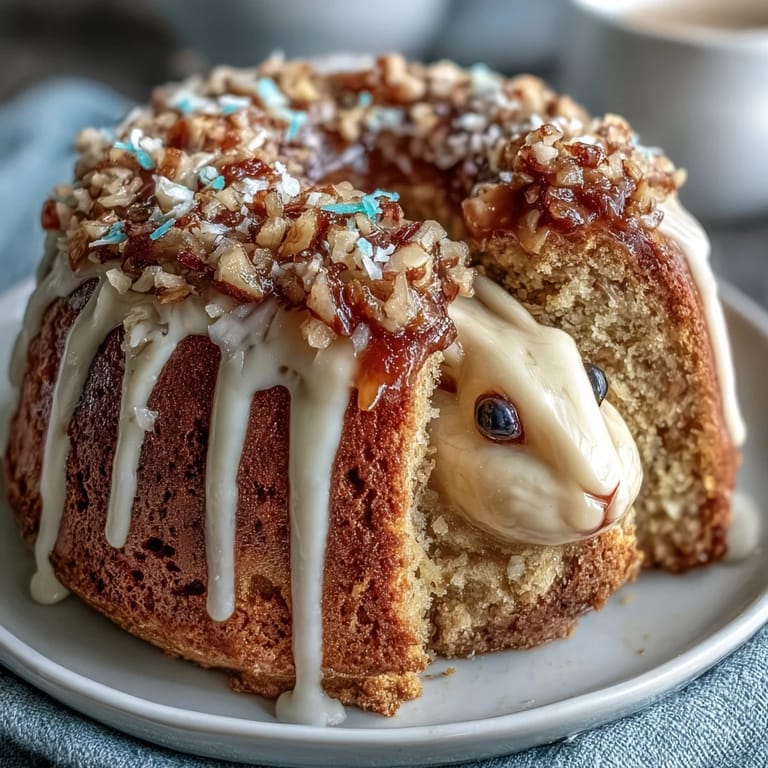
- Frost the cake and shape your bunny:
- Frost the entire layered cake with a crumb coat first—a thin layer that seals in any loose crumbs—then add a thicker final coat. From here, you'll cut one round to be the bunny face and slice the other round into ears and a bowtie shape, arranging everything on a large serving board.
- Decorate with personality:
- Sprinkle coconut over the frosting for that fuzzy bunny texture, add candy eyes, position jelly beans or pink candies for the nose, and top with a marshmallow tail if you want. Step back, smile at your slightly imperfect but utterly charming bunny, and take a photo before anyone knows what's coming.
- Chill before serving:
- Let the finished cake sit in the refrigerator for at least 30 minutes so the frosting sets and the whole thing becomes easier to slice cleanly. This also firms up the cake structure slightly, making it less likely to crumble when you cut into that glorious sprinkle surprise.
 Save to Pinterest
 There's something magical about watching someone's eyes widen when they realize the cake they're eating has a secret hiding inside. That moment—when surprise and sweetness and homemade effort collide on a plate—is what this cake is really about.
The Bunny Shape That Actually Works
Shaping two round cake layers into a recognizable bunny seemed impossible until I stopped trying to be precious about it. One round becomes the face, the other gets cut into two ear shapes and a small bowtie—none of it has to be perfectly symmetrical because, honestly, the imperfection is charming. Arrange everything on a board as if you're composing a whimsical face, and suddenly it reads as intentional rather than accidental.
Frosting Texture and Color
The difference between grainy, stiff frosting and fluffy, spreadable frosting comes down to patience and milk. Add your powdered sugar gradually rather than all at once, and use milk—not butter or cream—to loosen it because milk creates a lighter texture that's easier to work with. If you're adding color for the ears and nose, use gel food coloring because it won't thin out the frosting the way liquid coloring does.
Personalization and Quick Decorating Tips
This is your cake, so decorate it in whatever way feels festive to you. Whether you're going minimalist with just candy eyes and a jelly bean nose or full maximalist with coconut, marshmallows, and sprinkles scattered everywhere, it all works because the homemade energy carries the whole design.
- Use a piping bag with a grass tip to create fluffy fur texture if you want something fancier than plain frosting.
- Freeze the fully decorated bunny for an hour before serving if you want the cleanest, sharpest slices through the surprise center.
- Any leftover cake keeps well in an airtight container for up to three days, though the frosting firms up and the surprise center becomes even more dramatic.
 Save to Pinterest
 This bunny cake has a way of becoming part of the memory of the celebration, not just dessert served at it. Make it, watch faces light up, and know that you've created something a little more magical than just cake.
Recipe Questions & Answers
- → How do I create the hidden sprinkle center?
After baking and cooling the cake layers, cut a round hole in one layer and fill it with sprinkles. Then, seal with the cut-out piece to keep the sprinkles enclosed.
- → What decorations make the bunny shape stand out?
Use shredded coconut for fur texture, candy eyes, pink jelly beans for the nose, and marshmallows to shape ears and tail for a whimsical look.
- → Can I prepare the cake ahead of time?
Yes, chilling the assembled cake for 30 minutes before serving helps the frosting set and enhances the overall structure.
- → Are there variations for flavor?
Replace half the flour with cocoa powder for a chocolate version or use pre-made cake mixes for quicker preparation.
- → What tools are needed for assembly?
Two 8-inch round pans, an electric mixer, a 3-inch round cutter, an offset spatula, and a wire rack are essential for baking and shaping.