 Save to Pinterest
 My neighbor knocked on the door one February afternoon holding a bag of candy hearts her kids refused to eat. I stared at the pastel pile and thought about all those no-bake cheesecakes I'd tucked into springform pans over the years. Within an hour, I had whipped cream in one bowl, cream cheese in another, and a plan to turn those chalky little hearts into something worth celebrating. The result was so ridiculously pretty that I took a photo before anyone could cut a slice.
I brought this to a potluck where half the guests were convinced it was store-bought until I admitted I'd made it the night before. One friend kept circling back for tiny slivers, claiming she was just admiring the pastel border. By the end of the night, the pan was scraped clean and I had three requests for the recipe scribbled on napkins.
Ingredients
- Graham cracker crumbs: They form a buttery, slightly sweet base that holds together without baking and I've learned that pulsing whole crackers in a food processor gives you the finest, most packable texture.
- Unsalted butter: Melted butter binds the crumbs into a crust that slices cleanly and I always let it cool for a minute so it doesn't clump.
- Granulated sugar: Just enough to sweeten the crust without competing with the creamy filling above.
- Cream cheese: Softened to true room temperature, it whips into a cloud with no lumps and becomes the silky heart of this dessert.
- Powdered sugar: Sifting it prevents gritty pockets and keeps the filling velvety smooth.
- Pure vanilla extract: A teaspoon brings warmth and depth that balances the tang of the cream cheese.
- Heavy whipping cream: Cold cream whips to stiff peaks faster and folds into the filling for an airy, mousse-like texture.
- Pink gel food coloring: Optional but fun, a drop or two tints the frosting without thinning it.
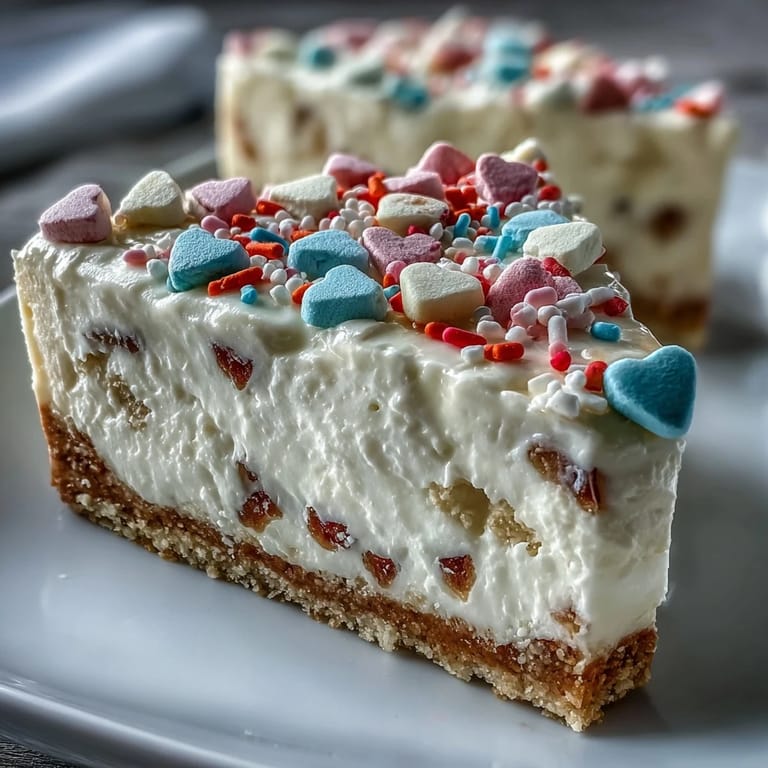
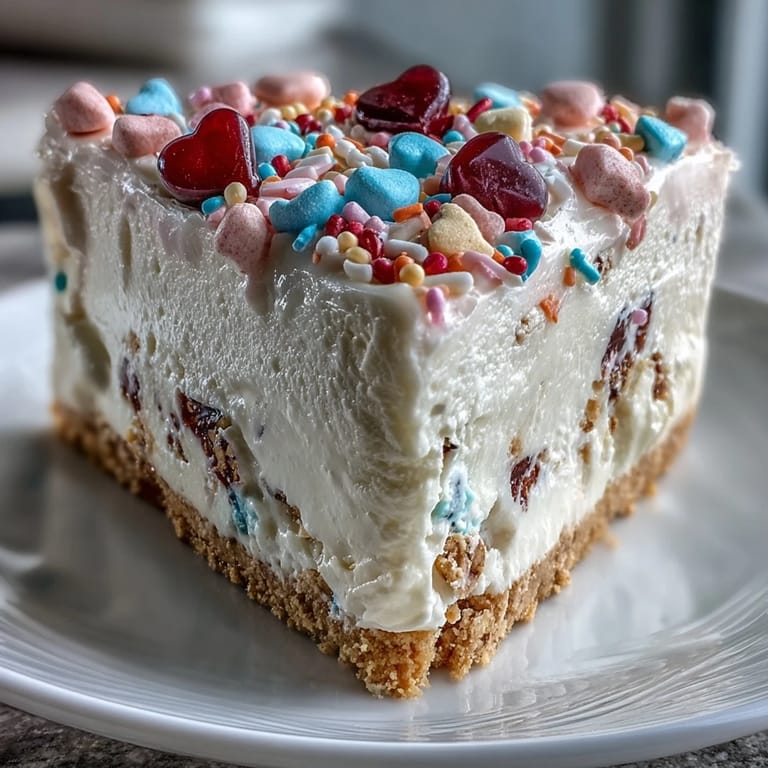
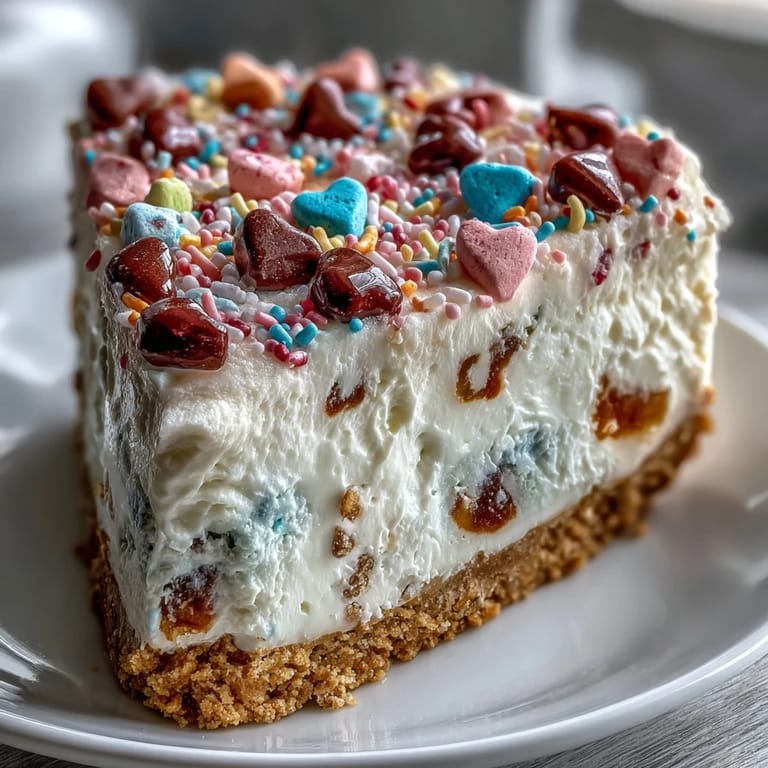
- Conversation heart candies: They add color, crunch, and a playful retro charm that makes every slice feel like a party.
- Rainbow sprinkles: A handful scattered on top catches the light and ties the whole look together.
Tired of Takeout? 🥡
Get 10 meals you can make faster than delivery arrives. Seriously.
One email. No spam. Unsubscribe anytime.
Instructions
- Build the crust:
- Stir graham cracker crumbs, melted butter, and sugar until the mixture clumps like wet sand when you squeeze it. Press it firmly into your lined springform pan, smoothing the surface with the bottom of a measuring cup so it's compact and even.
- Chill the base:
- Pop the pan into the fridge for fifteen minutes so the crust firms up and won't shift when you spread the filling on top.
- Whip the cream cheese:
- Beat softened cream cheese until it's smooth and fluffy, then blend in powdered sugar and vanilla until no lumps remain. The mixture should look pale and creamy, almost like frosting.
- Fold in whipped cream:
- Whip one cup of cold heavy cream to stiff peaks in a separate bowl, then gently fold it into the cream cheese mixture with a rubber spatula until just combined. This step keeps the filling light and airy instead of dense.
- Assemble and chill:
- Spread the cheesecake filling over the chilled crust, smoothing the top with an offset spatula. Cover the pan and refrigerate for at least four hours, or overnight if you want the firmest possible texture.
- Whip the frosting:
- In a clean chilled bowl, beat the remaining cup of heavy cream with powdered sugar and vanilla to stiff peaks, adding pink gel coloring one drop at a time if you want a pastel tint. The frosting should hold its shape when you lift the beater.
- Release and frost:
- Unlatch the springform pan and transfer the chilled cheesecake to a serving plate, then spread the whipped frosting evenly over the top and sides.
- Decorate with candy:
- Gently press conversation hearts into the frosting around the sides, covering it in an even layer, then scatter more hearts and rainbow sprinkles across the top. Handle the candies lightly so you don't crack the frosting.
- Final chill and serve:
- Refrigerate the decorated cake for thirty minutes to let the frosting and candy set, then slice and serve chilled.
 Save to Pinterest
 The first time I sliced into this cake, I watched the layers hold their shape and the candy hearts glint under the kitchen light. My daughter grabbed a fork and declared it tasted like Valentine's Day in dessert form. That's when I realized some recipes aren't just about flavor, they're about capturing a feeling you want to share.
Making It Ahead
I've made the cheesecake base two days in advance and left it covered in the fridge until I was ready to frost and decorate. The filling actually tastes better after a full night of chilling because the flavors meld and the texture firms up beautifully. Just wait to add the whipped frosting and candy until the day you plan to serve it so everything stays crisp and fresh.
Swapping the Crust
Graham crackers are classic, but I've swapped them for vanilla wafer crumbs when I wanted a lighter base and even crushed chocolate sandwich cookies for a richer contrast. The ratio stays the same, you just pulse your cookies of choice until fine and mix with melted butter and sugar. Each version changes the flavor profile slightly, so pick what sounds best to you.
Serving and Storage
This cake slices cleanest when you dip a sharp knife in hot water and wipe it clean between cuts. I've served it straight from the fridge on dessert plates with a few extra sprinkles on the side for anyone who wants more crunch. Leftovers keep covered in the refrigerator for up to three days, though the candy hearts will soften a bit as they sit.
- For firmer slices, freeze the assembled cake for one hour before frosting and decorating.
- Pair it with sparkling rosé or a fruity herbal tea to balance the sweetness.
- If you can't find conversation hearts, use any small pastel candies or even fresh berries for a different look.
 Save to Pinterest
 Every time I pull this cake from the fridge, I'm reminded that dessert doesn't have to be complicated to feel special. It just needs a little color, a lot of cream, and the willingness to let something sweet bring people together.
Recipe Questions & Answers
- → Can I make this dessert ahead of time?
Absolutely. In fact, this no-bake creation tastes better when made 1-2 days ahead. The flavors meld beautifully, and the texture becomes firmer. Store it covered in the refrigerator, and add the conversation hearts within a few hours of serving for maximum crunch.
- → What's the difference between this and a traditional baked cheesecake?
This version skips the oven entirely, relying on whipped cream lightened into cream cheese for that signature silky texture. The result is lighter, airier, and faster to prepare than a baked version, while still delivering that rich, creamy cheesecake flavor everyone loves.
- → Can I freeze this dessert?
Yes, freeze the completed cake (without decoration) for up to 2 months. Thaw overnight in the refrigerator before frosting and adding candy hearts. Freezing actually helps achieve a firmer, more sliceable texture, especially during warmer months.
- → What can I substitute for conversation hearts?
Try crushed peppermint candies, mini marshmallows, heart-shaped sprinkles, or even fresh berries arranged in heart patterns. For a different holiday theme, swap for pastel Easter candies, crushed Oreos, or seasonal edible flowers.
- → Why did my cream cheese mixture turn lumpy?
Lumps usually happen when cold cream cheese meets room-temperature ingredients. Make sure your cream cheese sits at room temperature for at least 2 hours before mixing. Beat it solo until completely smooth before adding anything else. Still lumpy? A quick 15-second zap in the microwave (in 5-second intervals) can help smooth things out.
- → Can I use a regular cake pan instead of a springform?
You can, but removing the finished dessert becomes tricky. Line your regular pan with parchment paper that overhangs the sides, creating handles to lift the chilled cake out. A 9-inch round cake pan works well as an alternative.