 Save to Pinterest
 A friend handed me a packet of hojicha tea at a Tokyo airport gift shop, insisting I'd understand Japan better through it. Months later, sitting in my kitchen on a quiet afternoon, I steeped a cup and was completely undone by its toasted, almost caramel-like warmth. That same evening, I wondered what would happen if I folded that exact flavor into buttercream, layered it between delicate sponge cake, and crowned it all with dark chocolate. Three attempts and one minor kitchen disaster later, this cake emerged as something I couldn't stop making.
I baked this cake for my neighbor's book club, thinking it might be nice but nothing extraordinary. When one of the guests closed her eyes after the first bite and said it tasted like autumn in Kyoto, I realized this recipe had become something worth protecting. She asked for it three times that year alone.
Ingredients
- Cake flour: Don't skip the sifting—it's the difference between a tender crumb and one that feels heavy.
- Eggs at room temperature: They whip into a more stable foam, which means your cake rises properly and stays delicate.
- Hojicha loose leaf tea: Buy the good stuff if you can; the roasted notes are what make this cake whisper instead of shout.
- Unsalted butter: Room temperature butter creams like silk, and you control the salt yourself.
- Dark chocolate (60–70% cocoa): Go darker rather than lighter so the ganache complements rather than competes with the hojicha.
- Heavy cream: Full fat is non-negotiable for a glossy, pourable ganache.
Tired of Takeout? 🥡
Get 10 meals you can make faster than delivery arrives. Seriously.
One email. No spam. Unsubscribe anytime.
Instructions
- Set the stage:
- Preheat your oven to 175°C and line those cake pans with parchment paper so your layers come out clean. Everything else—eggs, milk, butter—should be sitting out on the counter reaching room temperature while you work.
- Build the foundation:
- Beat eggs and sugar together until the mixture goes from runny and golden to thick, pale ribbons that fall slowly back into the bowl. This takes the full 5–7 minutes and you'll know it's right when your arm gets tired.
- Fold with intention:
- Add the flour in three parts, folding gently each time so you don't deflate all that air you just worked into the eggs. The mixture should go from thick to silky but never become soup.
- The milk mixture trick:
- Stir together your milk, melted butter, and vanilla, then add a spoonful of batter to it first. This tempers the mixture so when you fold it back, it doesn't shock the rest of the batter and cause it to break.
- Bake with patience:
- Divide evenly between pans and bake for 20–22 minutes until a skewer comes out clean. The cakes should smell buttery and light, and your kitchen will smell like a bakery you want to live inside.
- Cool before moving:
- Let them rest in the pans for exactly 10 minutes—this helps them set. Then flip them onto a wire rack and let them cool completely, or they'll fall apart when frosted.
- Infuse the hojicha milk:
- Heat milk until it steams, add the tea, and let it steep for 10 minutes while you do something else. The smell is meditative, almost hypnotic.
- Cream the buttercream:
- Beat butter with powdered sugar until it's light and fluffy, then slowly drizzle in your cooled hojicha milk. If it looks broken at first, keep beating—it'll come together into something cloud-like.
- Melt chocolate into glossiness:
- Heat cream until it steams, pour it over chopped chocolate, wait two minutes without touching it, then stir until you have liquid silk. Cool it to room temperature so it's pourable but not hot.
- Layer with care:
- Place the first cake layer down, spread half the hojicha buttercream evenly, place the second layer, then frost the top and sides with what's left. Pour the ganache slowly over the top and let gravity do its work down the sides.
- Chill and breathe:
- Refrigerate for 30 minutes so the flavors settle and the frosting firms up enough that slicing reveals clean layers instead of smudges.
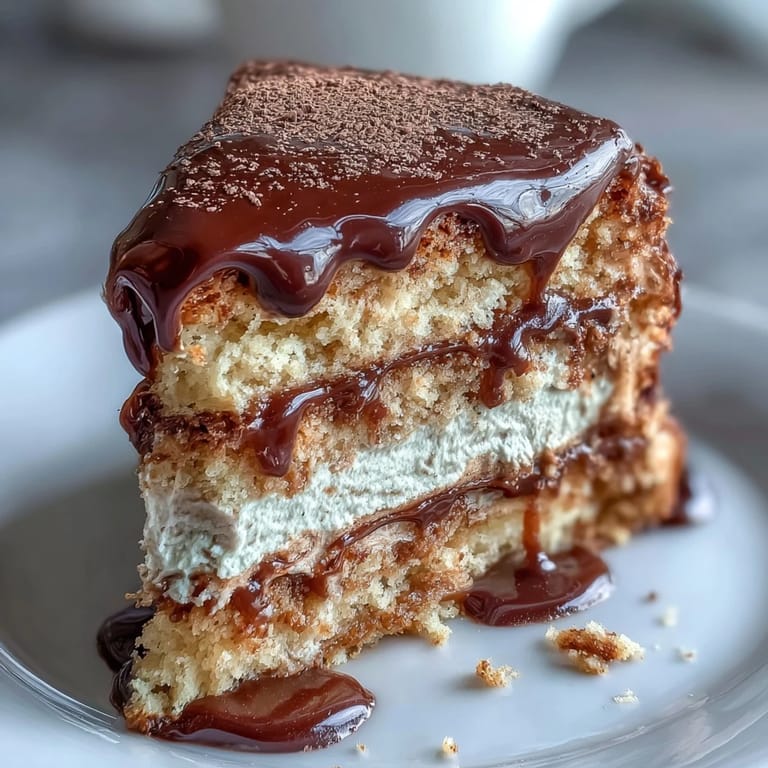
 Save to Pinterest
 There's a moment after you pour that dark chocolate ganache and watch it cascade down the cake that feels like small magic. It's when you know this simple combination of ingredients has become something beautiful enough to remember.
The Hojicha Secret
Hojicha is roasted green tea, and that roasting process changes everything about its character. Instead of the fresh, grassy notes of regular matcha or sencha, you get something warmer, almost like toasted hazelnuts or caramel. When you steep it in milk, it doesn't turn bitter the way strong tea sometimes does—it just deepens into something creamy and complex. The buttercream carries this flavor without overwhelming, so each bite tastes like you're discovering a secret ingredient rather than being hit over the head with a strong flavor.
When to Make This Cake
I've learned this cake is perfect for quiet afternoons when you want to bake something that feels like self-care, or for moments when you're trying to impress without stress. It doesn't require piping skills, fancy decorations, or techniques that fail on their first try. The timing is forgiving too—the components can be made separately, and assembly is just stacking and frosting, which anyone can do.
Finishing Touches & Storage
A light dusting of extra hojicha powder on top adds both flavor and visual interest, while chocolate shavings make it look like you spent twice as long on it. Store this cake covered in the refrigerator for up to three days, and let it sit at room temperature for 20 minutes before slicing so the layers don't crack. Pair it with a cup of Japanese green tea or oolong, and you've got an afternoon that tastes like contentment.
- Shave dark chocolate over the top using a vegetable peeler for elegant curls.
- A light sift of hojicha powder catches the eye and reminds people why they love this cake.
- Slice with a warm, wet knife between each cut for clean edges instead of crumbs.
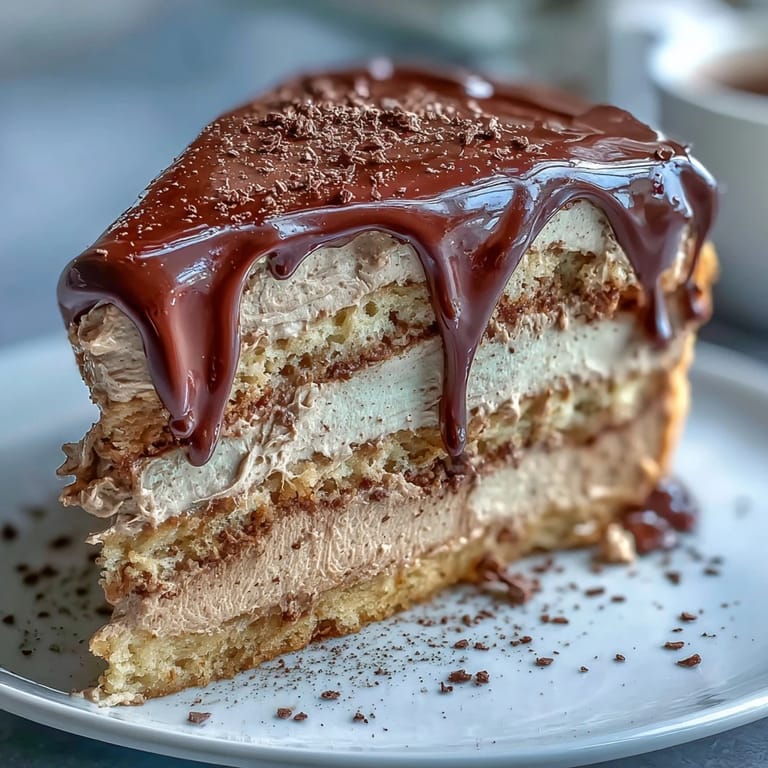
 Save to Pinterest
 This cake became my answer to the question of what happens when you respect an ingredient enough to build a whole dish around it. Every time you make it, you're proving that good food is just patience and attention meeting the right flavors.
Recipe Questions & Answers
- → What does hojicha taste like?
Hojicha has a distinctive roasted, earthy flavor with notes of caramel and subtle sweetness. Unlike other green teas, it's lower in caffeine and has a warm, toasty profile that pairs beautifully with buttercream and chocolate.
- → Can I make the cake layers ahead of time?
Yes, you can bake the sponge layers up to 2 days in advance. Wrap them tightly in plastic wrap and store at room temperature. The buttercream can also be made ahead and refrigerated for up to 3 days—bring to room temperature and re-whip before using.
- → How do I store the finished cake?
Store the assembled cake in the refrigerator, covered loosely with plastic wrap or in a cake container. It will keep for 3-4 days. Bring to room temperature for 30 minutes before serving for the best texture and flavor.
- → Can I substitute the hojicha tea?
While hojicha provides unique flavor, you could use other roasted teas like genmaicha or regular green tea powder (matcha). Keep in mind that the flavor profile will change—matcha will be more grassy and vibrant rather than roasted and mellow.
- → Why is my buttercream curdling when adding the tea milk?
This often happens if the milk is too cold or added too quickly. Ensure the hojicha milk is completely cooled to room temperature, and add it gradually while beating. If it curdles, keep beating—it usually comes back together as the butter emulsifies.
- → Can I freeze this cake?
The assembled cake doesn't freeze well due to the cream-based frosting. However, you can freeze the unfilled sponge layers for up to 3 months. Wrap each layer separately in plastic wrap and foil, then thaw at room temperature before assembling.