 Save to Pinterest
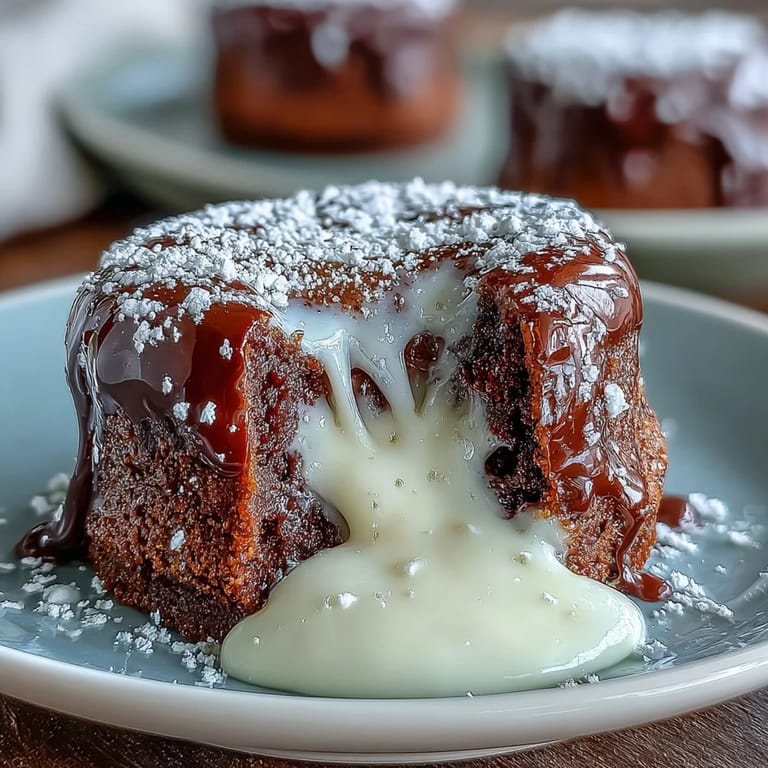
 Last winter, I was scrolling through photos of a dessert I'd eaten in Tokyo—a warm chocolate cake with that unmistakable roasted tea aroma—when my friend texted asking what I was making for her birthday dinner. Something clicked. That night, I started experimenting with hojicha powder and white chocolate, and after a few attempts and some wonderfully burnt practice batches, I landed on this: individual cakes that collapse into pure, creamy molten bliss the moment you cut into them. It's become my go-to when I want to feel like I've spent hours in the kitchen without actually losing my mind.
I made these for the first time at a dinner party, and I remember standing in the kitchen listening to everyone's forks hit the plates as those centers oozed out—that quiet moment before someone says 'oh my god.' One guest asked if I'd trained as a pastry chef, and I laughed while plating the last one, thinking about how close I'd come to setting off the smoke alarm during my practice run.
Ingredients
- White chocolate, chopped (80 g): This becomes your molten heart, so use good quality chocolate you'd actually eat on its own—cheaper stuff tastes waxy when it's the star.
- Unsalted butter (60 g plus extra): The extra bit for greasing matters because it keeps the cakes from sticking without adding unwanted flavors.
- Eggs (2 large) and egg yolk (1 large): The extra yolk creates richness and helps lock in moisture, giving you that tender, almost custard-like texture.
- Granulated sugar (60 g): Whisk this with the eggs until it looks pale and ribbon-like—this step incorporates air that keeps the cake light despite all the chocolate.
- All-purpose flour (30 g): Measure by weight if you can; too much flour turns this into a dense hockey puck instead of a delicate cake.
- Hojicha powder (2 tbsp): This roasted green tea is the secret ingredient that makes people ask what they're tasting—seek out finely ground versions from Japanese grocery stores or online.
- Salt (pinch): A tiny bit amplifies the hojicha's roasted notes and keeps the white chocolate from tasting cloying.
Tired of Takeout? 🥡
Get 10 meals you can make faster than delivery arrives. Seriously.
One email. No spam. Unsubscribe anytime.
Instructions
- Prep your ramekins properly:
- Grease them generously with softened butter, then dust with flour and tap out any excess—this prevents sticking and gives you clean edges when you invert. Think of it like creating a non-stick coating that you can actually see.
- Build your chocolate base:
- Melt the white chocolate and butter together over barely simmering water, stirring occasionally until completely smooth. If it starts looking grainy or separated, you've let it get too hot—pull it off the heat and stir gently until it comes together.
- Create your egg foam:
- Whisk the eggs and sugar in a separate bowl for 2–3 minutes until it transforms into something pale and thick enough that ribbons hold their shape when you lift the whisk. This takes longer than you think it should, but it's worth it.
- Combine dry ingredients gently:
- Sift the flour, hojicha powder, and salt directly into your egg mixture—sifting prevents lumps and ensures the hojicha powder distributes evenly. Fold gently with a spatula, using a scraping motion from the bottom of the bowl.
- Marry the two mixtures:
- Pour the cooled chocolate mixture into the egg foam and fold it together with a light hand—stop as soon as you don't see streaks anymore. Overmixing deflates all that air you just worked to incorporate, and your cake will end up dense.
- Fill and rest before baking:
- Divide the batter evenly among ramekins, filling each about three-quarters full. Let them sit at room temperature for 5 minutes while your oven finishes preheating to give the batter a chance to settle.
- Bake until perfectly molten:
- Bake for 12 minutes—the edges should look set and slightly golden while the very center still jiggles slightly when you give the ramekin a gentle shake. You're looking for that balance between cooked exterior and liquid interior.
- Invert with confidence:
- After resting for just 1–2 minutes, run a thin knife around the edges to loosen the cake, then place a serving plate on top and flip. The warmth helps it release cleanly, so don't wait too long or it'll stick.
 Save to Pinterest
 There's something magical about watching someone's face light up when that warm chocolate flows onto their plate—it's the kind of moment that reminds you why cooking for people matters. These cakes taught me that a little planning and precision in the kitchen can create something that feels effortless and indulgent to whoever's eating it.
The Hojicha Difference
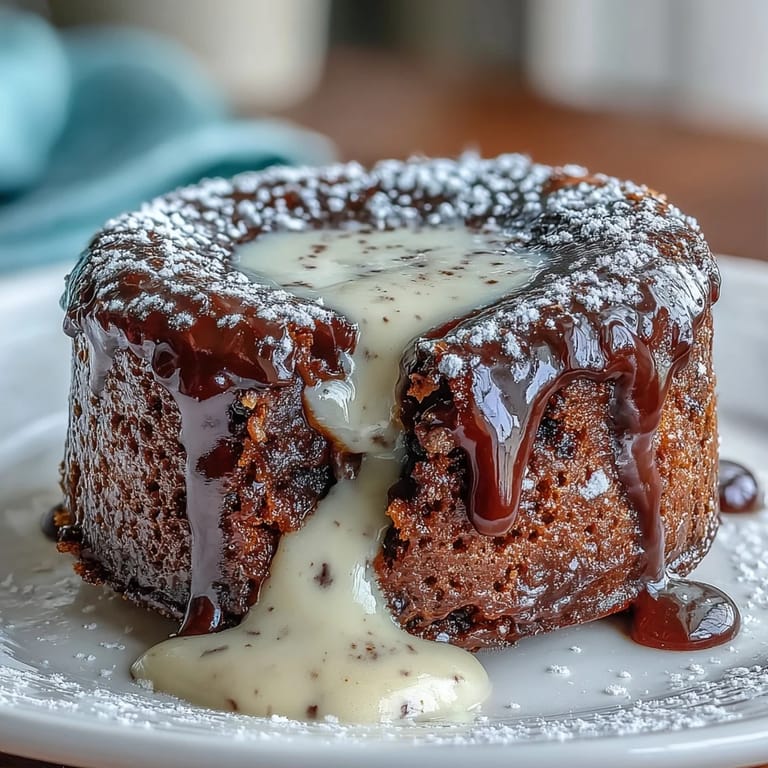
Hojicha changed my entire approach to white chocolate desserts. Before discovering it, I thought white chocolate was just sweetness with a buttery note, but hojicha's roasted, almost nutty character gives it substance and depth. The tea powder also adds a subtle earthiness that keeps the cakes from feeling cloying, even with the white chocolate center.
Temperature and Timing Matter
I learned this the hard way during a dinner party when I got distracted and pulled the cakes out a minute early—they were still too soft in the middle to flip without collapsing all over the plate. Since then, I set a timer and stay nearby; the oven temperature also matters more than I expected, so I use an oven thermometer now to make sure mine's actually accurate.
Serving and Variations
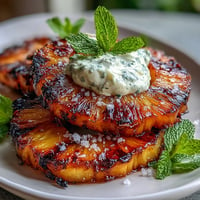
Dust these with powdered sugar right before serving so it doesn't dissolve into the warmth, and have your serving plates ready—cold plates will set the chocolate before you want them to. A small scoop of vanilla ice cream melting into the molten center is pure luxury, though I've also served them with whipped cream and fresh raspberries for a lighter touch.
- Try adding a tiny splash of vanilla extract or even a whisper of cardamom to the egg mixture for subtle flavor variations.
- If you want to skip the hojicha, matcha powder creates a brighter, more floral version that works beautifully with white chocolate.
- These cakes pair perfectly with strong coffee, cold milk, or even a light dessert wine if you're feeling fancy.
 Save to Pinterest
 This recipe transformed my confidence in the kitchen because it proved that looking impressive and being actually delicious aren't mutually exclusive. Make these, watch people's faces, and let the hojicha and white chocolate do the talking.
Recipe Questions & Answers
- → What is hojicha?
Hojicha is a Japanese green tea that has been roasted over charcoal, giving it a nutty, toasty flavor and deep reddish-brown color. Unlike other green teas, it has lower caffeine and a milder profile that pairs beautifully with white chocolate.
- → Can I make the batter ahead of time?
Yes, you can prepare the batter a few hours in advance and store it in the refrigerator. Let it come to room temperature for about 15 minutes before baking. You may need to add 1-2 minutes to the baking time if the batter is chilled.
- → How do I know when the cakes are done?
The edges should be set and firm while the center remains soft and jiggly when gently shaken. A toothpick inserted into the edge should come out clean, but the center should still be molten.
- → Can I freeze these lava cakes?
You can freeze unbaked batter in the prepared ramekins for up to 2 weeks. Wrap tightly with plastic wrap and foil. Bake from frozen, adding 2-3 minutes to the baking time.
- → What can I substitute for hojicha powder?
Matcha powder works well for a vibrant green tea version. Alternatively, try roasted kukicha or genmaicha powder for similar nutty notes. For a non-tea variation, espresso powder creates a mocha flavor profile.
- → Why did my cakes collapse?
Collapsed cakes usually result from underbaking or removing them too soon. Ensure the edges are fully set before taking them out. Also, let them rest for 1-2 minutes after baking to set slightly before inverting.