 Save to Pinterest
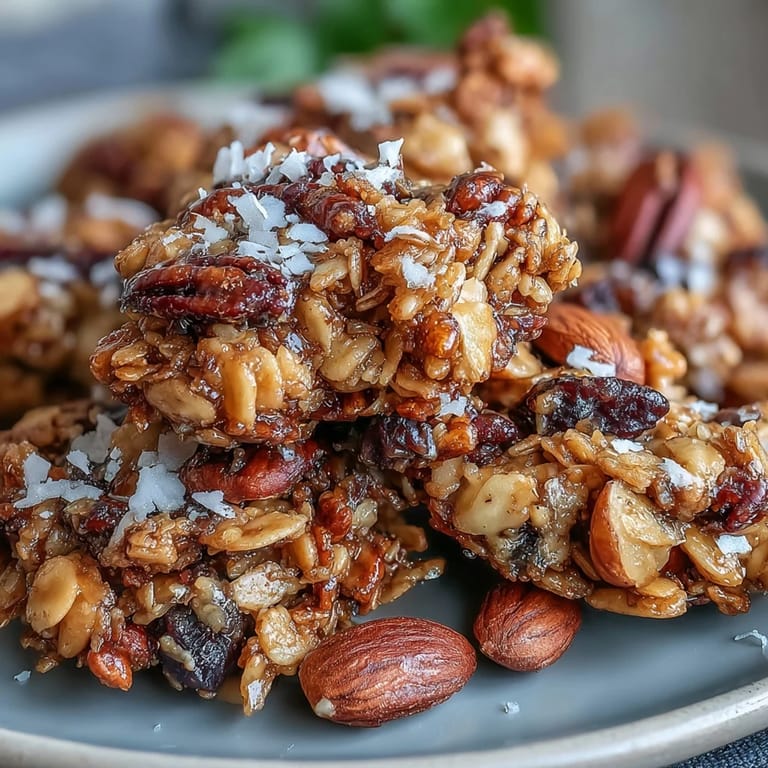
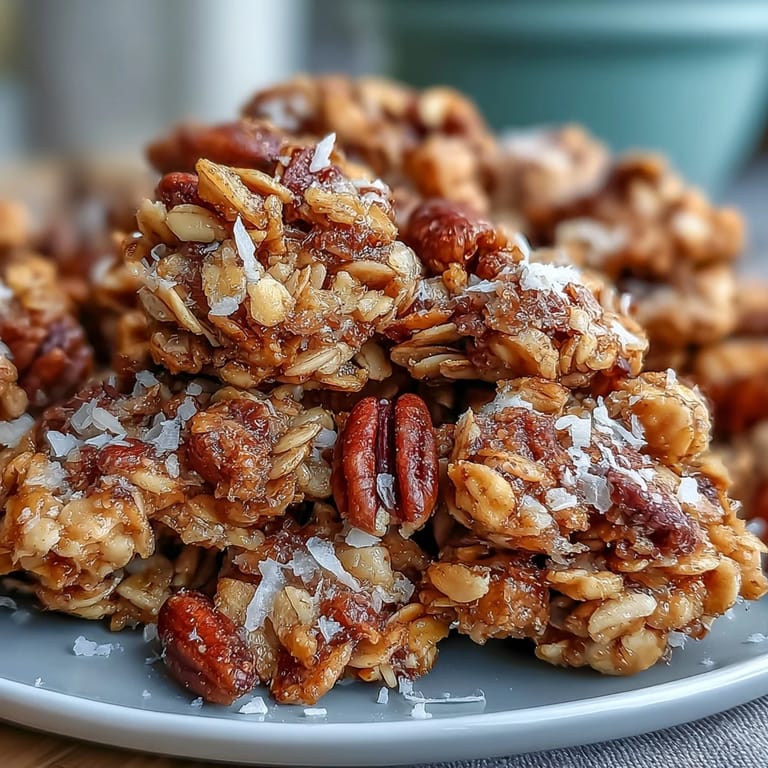
 Crunching through a warm tray of homemade granola clusters makes me think of weekend mornings when I’d wake before anyone else, lured into the kitchen by the sweet, toasty scent drifting from the oven. The act of stirring together oats and nuts, then pressing the golden mix onto a baking sheet, became a quiet ritual I looked forward to. Sometimes my cat would circle my feet hoping for a stray sunflower seed, and I’d try not to steal a taste before the clusters had cooled. Even after the first batch turned out more crumbly than chunky, the satisfaction was unmistakable: a simple pleasure, both hearty and just sweet enough.
One particularly rainy afternoon, I made these granola clusters for my friend Emily, who’d just finished a tough week. We sat at my cluttered kitchen table, breaking apart the golden sheets, chatting about everything and nothing while warm clusters disappeared faster than I’d expected. It wasn’t fancy, but by the end, we both agreed that the simplest treats can make a dreary day feel lighter.
Ingredients
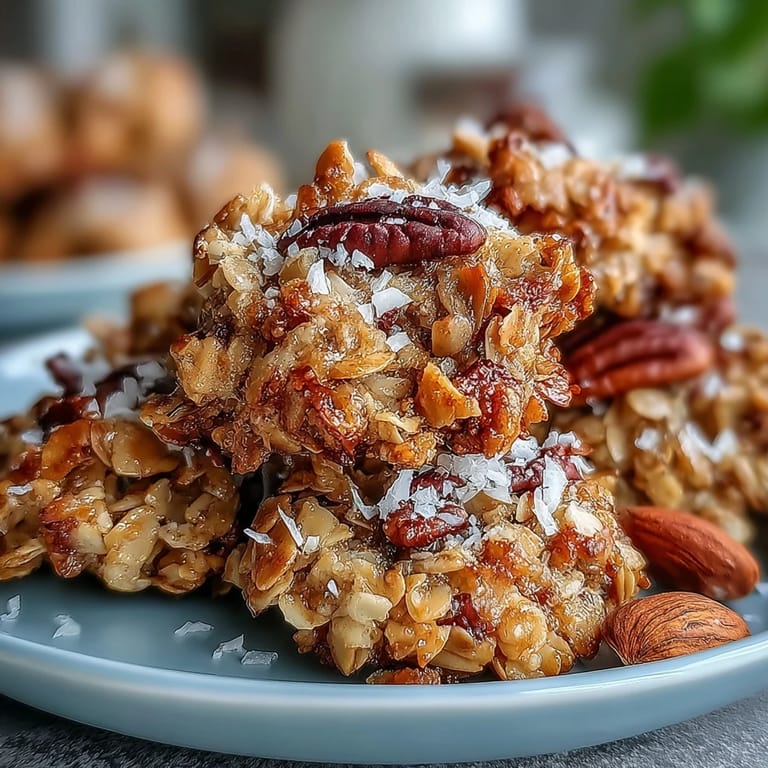
- Old-fashioned rolled oats: These bring sturdy texture and help the granola cling in thick clusters; make sure to use rolled, not quick oats, for the best crunch.
- Mixed nuts (almonds, pecans, walnuts): I always give these a rough chop so you get an even mix of crunch in every bite—whatever variety you prefer will work, but balance softer and firmer nuts for more texture.
- Unsweetened shredded coconut (optional): Adds a subtle chewiness and extra richness; toasting it first deepens the flavor even more.
- Sunflower seeds (optional): These tiny seeds lend extra crunch and a nutty undertone—I started using them after a happy accident during a pantry clean-out.
- Ground cinnamon: Just a bit brings warmth and an irresistible aroma.
- Salt: A pinch wakes up all the flavors; don’t skip it, even if it seems small.
- Honey (or maple syrup): This is what binds everything and gives that gentle lingering sweetness—maple syrup works beautifully for a vegan option and lends its own subtle flavor twist.
- Melted coconut oil (or unsalted butter): It makes the clusters rich without weighing them down; coconut oil adds a hint of tropical flavor, but butter is equally good if you have it on hand.
- Pure vanilla extract: I pour it in with a heavy hand for aroma—trust me, it makes the kitchen smell like a bakery.
- Dried fruit (cranberries, raisins, chopped dates): Stir these in after baking for chewy, tart-sweet pops.
- Mini chocolate chips: Add these only after the granola’s cooled so they don’t turn into a melty mess—I learned this lesson the hard way.
Tired of Takeout? 🥡
Get 10 meals you can make faster than delivery arrives. Seriously.
One email. No spam. Unsubscribe anytime.
Instructions
- Get your oven ready:
- Set the oven to 325°F and line a baking sheet with parchment paper, so clean-up is a breeze and nothing sticks.
- Mix dry ingredients:
- Tumble the oats, nuts, coconut, sunflower seeds, cinnamon, and salt into a big bowl and give everything a good stir until it looks rustic and inviting.
- Combine wet ingredients:
- In a second bowl, whisk the honey (or maple syrup), melted coconut oil, and vanilla extract until the mixture looks glossy and smells sweet.
- Bring it all together:
- Pour the wet blend over the dry and use a sturdy spoon (or your hands) to make sure every flake is coated—the oats should look slightly glossy and stick together as you mix.
- Spread and press:
- Tip the mixture onto your prepared baking sheet, then firmly press it into an even layer with a spatula to encourage those chunky clusters that are everyone’s favorite part.
- Bake and don’t stir:
- Slip the tray into the oven for 25–30 minutes, rotating halfway, but resist the urge to stir; the magic of big clusters only happens if you leave it be as it turns golden.
- Cool completely:
- Let the granola cool right there on the sheet—it will crisp up as it rests, so keep temptation at bay and wait until it’s entirely cool before breaking it into big, satisfying chunks.
- Finishing touches:
- Once it’s cooled, break apart gently and mix in your dried fruit or chocolate chips if using; store in a jar or airtight container for the freshest crunch.
 Save to Pinterest
 I’ll never forget the time a neighbor stopped by just as I was breaking up a newly baked granola sheet—the look of delight on her face when I offered her a hunk still warm from the oven made me realize how even the simplest snack can create community. Now I always have a batch ready to share when someone drops in.
Make It Your Own With Every Batch
One of my favorite things about these granola clusters is how adaptable they are—I rarely make them the exact same way twice. Sometimes I add a handful of chopped dates when I want extra chewiness or switch in pumpkin seeds for a different crunch. Don’t be afraid to toss in a little of whatever grains or dried fruit you have lurking in the pantry; the clusters will forgive you.
Granola Cluster Troubleshooting
If the clusters turn out too loose, it’s usually because the mixture wasn’t packed down firmly enough or the wet ingredients were skimped. If they’re too hard, try reducing bake time slightly or adding a tablespoon more oil next round. And if the edges over-brown, tent them loosely with foil in the last ten minutes to prevent burning.
Storage, Serving and Last-Minute Tips
Granola clusters truly shine with a quick pour of cold milk or yogurt, but don’t overlook tossing a few into your bag for busy-day snacking. I sometimes press extra clusters into a bowl to make a quick crust for yogurt parfaits, or even sprinkle them over ice cream for a grown-up treat.
- Store in an airtight jar at room temperature for up to 2 weeks.
- Let the clusters cool completely before sealing to avoid any unwanted sogginess.
- Break them only when fully cooled for maximum chunkiness.
 Save to Pinterest
 Here’s hoping these granola clusters bring a little comfort and crunch to your week—whether you savor them quietly with coffee or share them by the handful with friends.
Recipe Questions & Answers
- → How do I encourage large, chunky clusters?
Press the mixture firmly into a compact, even layer before baking and avoid stirring while it bakes. Cooling completely on the baking sheet lets the binder set so you can break larger pieces.
- → Can I make these without honey?
Yes — substitute equal parts maple syrup for honey for a vegan option. Melted coconut oil or a neutral oil keeps the mixture cohesive when combined with the syrup.
- → How can I prevent the edges from burning?
Rotate the tray halfway through baking and use parchment to reduce hot spots. If edges brown too quickly, lower oven temperature by 10–15°F and extend bake time until evenly golden.
- → What’s the best way to store the clusters?
Cool completely, then store in an airtight container at room temperature for up to two weeks. For longer storage, freeze portions in a sealed bag for up to three months.
- → Can I swap nuts, seeds, or add-ins?
Absolutely — mix and match almonds, pecans, walnuts, pumpkin seeds, chia or flaxseeds. Add dried fruit or chocolate chips only after cooling to prevent melting or sogginess.
- → How do I make them chewier or crispier?
For chewier clusters, press slightly thicker, increase syrup slightly and shorten bake time. For crisper clusters, press thinner and bake a few minutes longer until evenly golden.