 Save to Pinterest
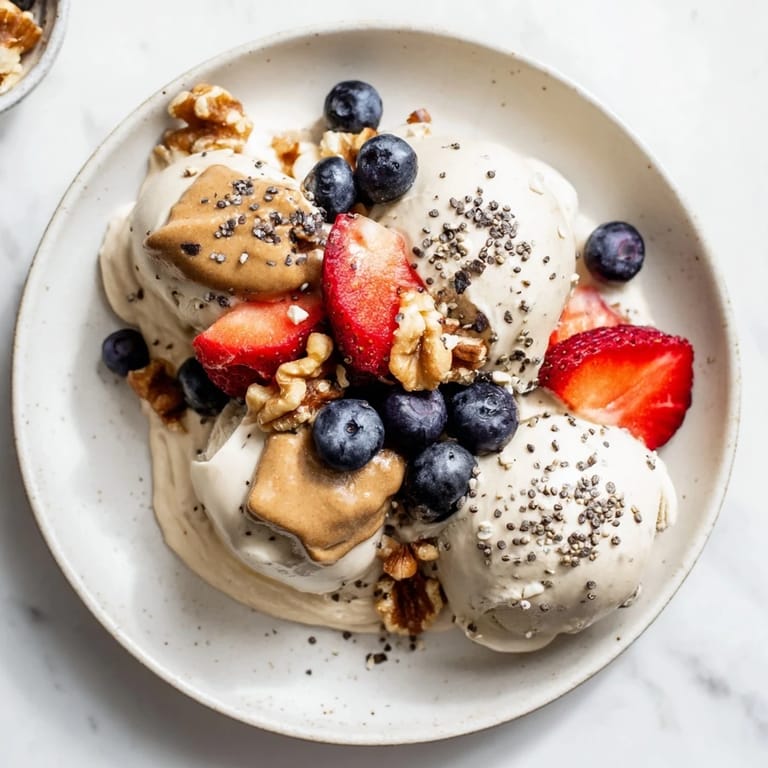
 The first time I made a protein ice cream bowl, I was standing in my kitchen on a sweltering afternoon, desperate for something cold and actually nutritious. My Ninja Creami had been sitting on the shelf for months, mostly forgotten, so I decided to finally put it to use with a simple blend of Greek yogurt, protein powder, and almond milk. What came out was revelatory—creamy, frosty, and packed with enough protein that I didn't feel guilty eating it as a meal rather than just a dessert.
I remember serving these to friends on a summer evening, and watching them dig into their bowls with genuine surprise that something this creamy could be high-protein. One friend actually asked if I'd used ice cream as a base, and when I explained it was just yogurt and powder, they demanded the recipe on the spot. That moment made me realize how often we assume healthy food has to taste like punishment.
Ingredients
- Greek yogurt: The foundation of everything—it's tangy, thick, and packed with protein, so don't skip it or substitute it with regular yogurt, which won't freeze properly.
- Almond milk: This keeps the mixture pourable before freezing; regular milk works too, but almond milk gives it a slightly lighter texture.
- Protein powder: Vanilla is my default, but chocolate works beautifully if you want to lean into that vibe.
- Maple syrup or sweetener: A touch of sweetness balances the tartness of the yogurt—taste as you go and adjust to your preference.
- Vanilla extract: A small splash makes the whole thing taste more like dessert and less like a health food.
- Salt: Just a pinch; it rounds out the sweetness and makes flavors pop.
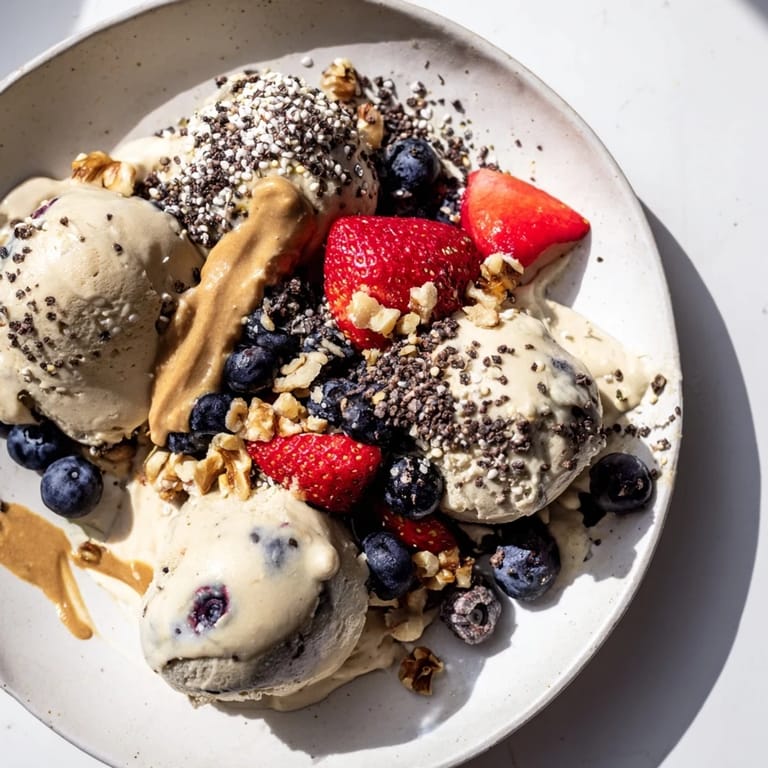
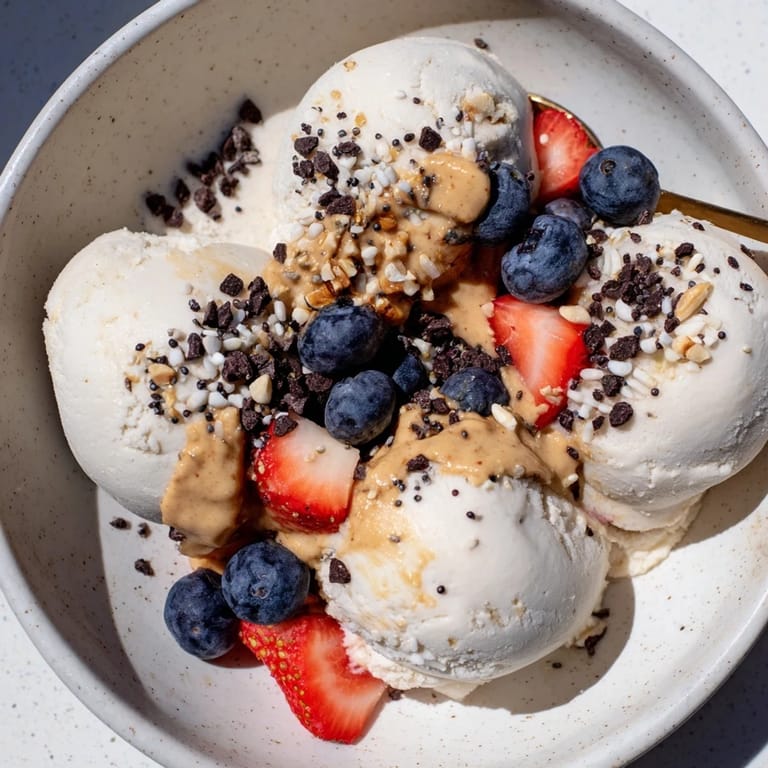
- Toppings: These are optional but honestly what make it feel like a real treat—berries add freshness, nut butter adds richness, and seeds or chocolate chips give you that satisfying crunch.
Tired of Takeout? 🥡
Get 10 meals you can make faster than delivery arrives. Seriously.
One email. No spam. Unsubscribe anytime.
Instructions
- Blend the base:
- Combine your Greek yogurt, almond milk, protein powder, sweetener, vanilla, and salt in a blender and process until completely smooth with no powder streaks or lumps. This usually takes about 30 seconds at high speed.
- Pour and freeze:
- Transfer the mixture into your Ninja Creami pint container or any freezer-safe vessel, leveling it out as best you can. Slide it into the freezer and give it at least 8 hours, though overnight is ideal.
- Process the ice:
- Once solid, pop the container into your Ninja Creami and run it on Ice Cream mode according to your machine's instructions. If you don't have a Creami, you can let it soften for 10 minutes and blend or scoop it.
- Adjust texture:
- If it came out too hard or icy, respin it for extra creaminess, or splash a bit of milk over it and spin again for a softer serve. This is where you get to play and figure out your preferred consistency.
- Finish and serve:
- Scoop into a bowl, pile on your toppings—berries, nut butter, chocolate chips, whatever you're craving—and eat it immediately while it's at that perfect half-frozen state.
 Save to Pinterest
 There's something almost magical about watching a container of yogurt mixture transform into something scoopable and creamy through a machine. It felt like I'd unlocked a secret that summer, and suddenly I was making these bowls constantly—sometimes vanilla, sometimes chocolate, always different toppings. My kitchen became the unofficial ice cream parlor for anyone who wanted protein without the guilt.
Flavor Variations That Actually Work
Once you nail the base, you can experiment endlessly without messing up the structure. Add cocoa powder for chocolate, dissolve instant coffee into the almond milk for mocha, or blend in a handful of frozen berries for something fruity. I've found that most flavor additions stay subtle, which is honestly perfect—you're enhancing, not reinventing.
The Topping Strategy
I learned pretty quickly that the right toppings transform this from good to craveable. Berries add brightness and contrast the creaminess, while nut butters swirl in beautifully and add richness. Seeds give you a nutritional boost and subtle texture, and a sprinkle of chocolate chips is always the right call.
Adapting This for Different Diets
The beauty of this recipe is how easily it bends to different needs. Going vegan? Swap the Greek yogurt for coconut or oat-based yogurt and use plant-based protein powder. Want even lower sugar? Skip the maple syrup entirely or use a sugar-free sweetener instead. I've made versions for friends with dietary restrictions and honestly, they taste just as good.
- Always read your protein powder label for allergens—some brands sneak soy in there.
- If you're using nut butters as toppings, double-check if they're the kind that separate or if they're the spreadable kind you prefer.
- This freezes beautifully for a few days, so make a batch on Sunday if meal prep is your thing.
 Save to Pinterest
 This recipe has become my go-to when I want something that feels like a treat but actually nourishes me. It's proof that healthy food doesn't have to taste like a compromise.
Recipe Questions & Answers
- → How do I achieve a smooth texture in this frozen bowl?
Blending Greek yogurt with almond milk and protein powder until fully smooth before freezing ensures a creamy texture once frozen.
- → Can I customize the flavor of this frozen treat?
Yes, adding toppings like berries, nut butters, chocolate chips, or seeds provides variety and enhances flavor and texture.
- → Is this bowl suitable for dietary restrictions?
It’s gluten-free and can be made vegan by substituting plant-based yogurt and protein powder.
- → What equipment is needed for preparation?
A blender and a freezer-safe container are essential. Using a specialized ice cream maker can enhance creaminess but isn’t required.
- → How long should I freeze the mixture?
Freeze the blended mixture for at least 8 hours or overnight to ensure it sets properly before serving.
- → Can sweetness be adjusted?
Yes, maple syrup or other sweeteners can be added or omitted to suit personal taste preferences.