 Save to Pinterest
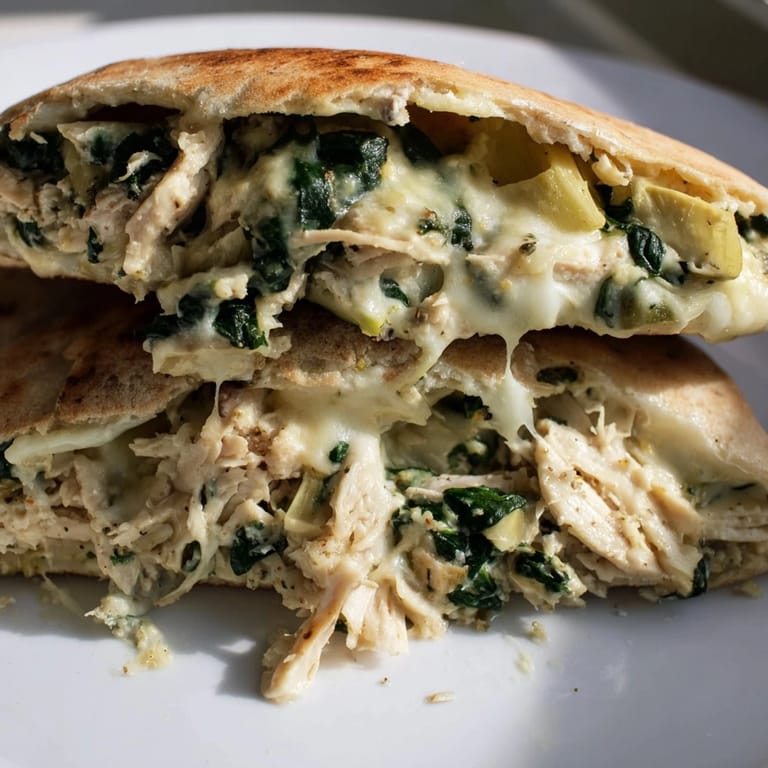
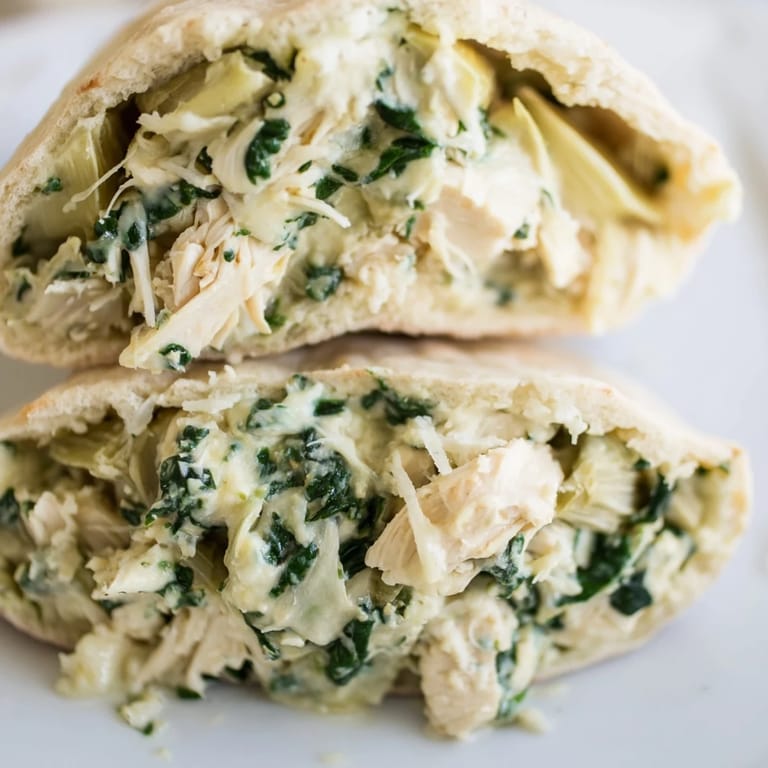
 The idea of stuffing spinach artichoke dip into a pita pocket hit me during a busy weeknight when I wanted something comforting but not heavy. My oven was already warm from roasting vegetables, and I had leftover chicken from the weekend. That first batch came out of the oven bubbling and fragrant, and I knew this was going to be a regular rotation.
My sister-in-law requested these after raving about a similar version at a restaurant. I made them for her family dinner, and her kids kept asking when we were having stuffed pitas again. That's when I realized this wasn't just grown-up food disguised as comfort, but genuinely something everyone gravitates toward.
Ingredients
- 2 cups cooked chicken breast: Rotisserie chicken works beautifully here and saves considerable time
- 1 cup canned artichoke hearts: Drain them well and give them a rough chop for satisfying texture
- 1 cup fresh spinach: Chop it finely so it distributes evenly throughout the filling
- 1/2 cup Greek yogurt: This keeps the mixture creamy while adding a pleasant tang
- 1/4 cup light mayonnaise: Just enough to bind everything together without overpowering
- 1/2 cup shredded mozzarella cheese: Creates that irresistible melted cheese factor
- 1/4 cup grated Parmesan cheese: Adds a savory depth that complements the artichokes
- 1 clove garlic, minced: Fresh garlic makes a noticeable difference here
- 1/2 teaspoon onion powder: Rounds out the savory notes without adding moisture
- 1/2 teaspoon dried oregano: Brings a hint of Mediterranean brightness
- 1/4 teaspoon crushed red pepper flakes: Optional, but a subtle warmth makes everything else pop
- Salt and black pepper: Taste as you go since the cheeses already bring saltiness
- 4 large pita breads: Whole wheat adds nuttiness and holds up well to filling
- Fresh parsley and lemon wedges: These finishing touches add brightness and freshness
Tired of Takeout? 🥡
Get 10 meals you can make faster than delivery arrives. Seriously.
One email. No spam. Unsubscribe anytime.
Instructions
- Preheat your oven:
- Get it to 375°F so you can bake immediately after stuffing the pitas
- Mix the filling:
- Combine everything except the pitas in a large bowl until it's evenly distributed
- Prepare the bread:
- Cut each pita in half to create pockets, being careful not to tear through the bottom
- Stuff generously:
- Fill each pita half as full as possible without splitting the seams
- Bake until golden:
- Arrange on a parchment-lined sheet and bake 15 to 20 minutes until hot and melty
- Finish with freshness:
- Sprinkle with parsley and serve alongside lemon wedges for squeezing over the top
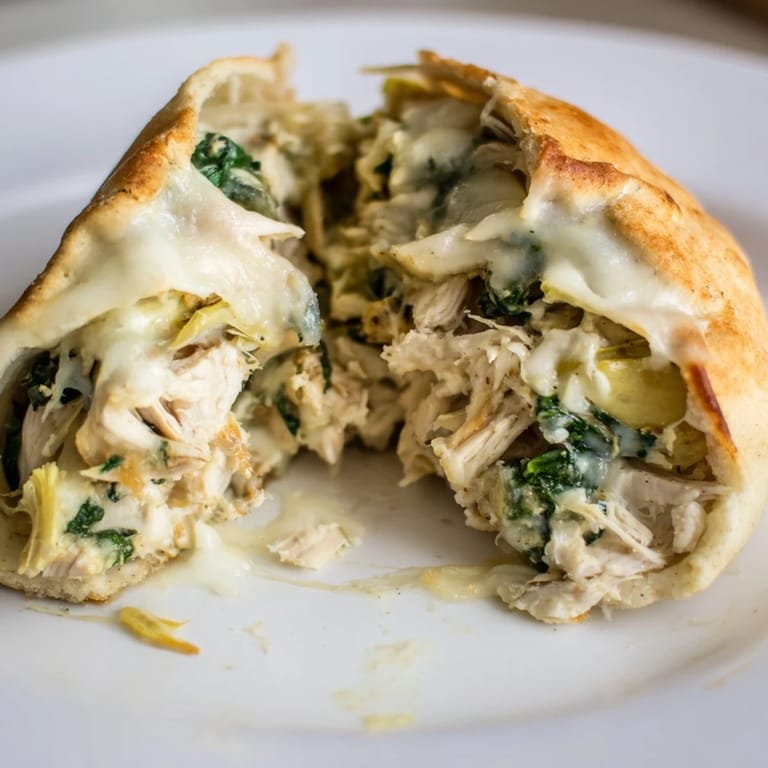 Save to Pinterest
 These became my go-to when friends with kids come over for dinner. The children love eating something that feels like a treat, while the adults appreciate that it's actually a balanced meal. I've started keeping a batch of the filling in the fridge for emergency lunches throughout the week.
Making Ahead
The filling keeps beautifully in the refrigerator for up to three days. I often mix a double batch on Sunday and stuff pitas fresh throughout the week. The flavors actually develop and improve after a day or two.
Freezing Instructions
You can freeze stuffed pitas before baking for up to two months. Wrap each individually in plastic wrap, then place them in a freezer bag. Bake from frozen, adding about five minutes to the cooking time.
Serving Suggestions
A crisp green salad with a bright vinaigrette cuts through the richness perfectly. For heartier appetites, serve alongside roasted vegetables or a simple soup.
- Try adding sun-dried tomatoes for a burst of sweet-tart flavor
- Crumbled bacon or diced ham works as a surprising but delicious addition
- These reheat surprisingly well the next day for a quick lunch
 Save to Pinterest
 There's something deeply satisfying about turning dip ingredients into a proper meal. These pitas never fail to disappear quickly whenever I serve them.
Recipe Questions & Answers
- → Can I prepare the filling ahead of time?
Yes, prepare the filling up to 24 hours in advance and store it in an airtight container in the refrigerator. Stuff the pitas and bake just before serving for best results.
- → What type of chicken works best?
Rotisserie chicken adds exceptional flavor and saves preparation time. Alternatively, poach or grill chicken breasts, then dice or shred them for the filling.
- → How do I prevent soggy pita bread?
Use fresh pita bread and avoid over-mixing the filling with watery ingredients. Let excess liquid drain from canned artichokes before adding them to the mixture.
- → Can I make this without dairy?
Substitute Greek yogurt with dairy-free yogurt, use lactose-free cheese, and replace mayonnaise with a dairy-free alternative to accommodate dietary preferences.
- → What are good side dishes to serve with this?
A crisp green salad with lemon vinaigrette, roasted vegetables like bell peppers or zucchini, or a light tomato soup complement this filling main dish nicely.
- → Can I freeze the stuffed pitas?
Yes, freeze assembled pitas on a baking sheet for 2 hours, then transfer to freezer bags for up to 3 months. Bake from frozen, adding 5-10 extra minutes to cooking time.